在阅读本文之前,强烈建议仔细阅读上文了解Junit3的一些相关内容,那么你更需要了解Junit4。
Junit3 -> Junit4
在将Junit4之前,我们需要先回顾一下Junit3的一些特性及一些评价:
- 测试类需要继承TestCase,但是java只能单继承
- 测试类的测试方法需要以
test方法开头,不够美观,不够优雅 - 初始化和回收代码在每个测试方法之前调用,一些方法其实可以统一初始化的,而无需每次测试前都初始化一遍,也即不支持类初始化
- 如果一个方法的测试,需要模拟很多参数的时候,可能需要写很多重复的代码,不够优雅
- 要写的东西总感觉有点多
- …
于是,Junit4出来了,Junit4 主要使用自Java 1.5起支持的注解技术。But,Andorid SDK默认是使用Junit3的,因此,如果需要在Android Studio中使用Junit4,那么我们需要引入Junit4的类库才能使用,在app/build.gradle中添加下面依赖库:
1 | dependencies { |
@Test
Junit3中我们测试一个方法需要继承TestCase并且需要测试的方法都需要固定前缀命名为test
e.g
1 | public class MathUtil { |
1 | // Junit3 写法 |
但是同样的测试用例,在Junit4中仅需要用@Test注解就可以完成了:
1 | // Junit4 写法 |
Junit3 -> Junit4测试方法使用比较:
- 不用继承
TestCase - 不用固定方法命名前缀一定加
test,可以实现测试类和源码类,类名方法名完全保存一致,高雅直观 - 仅需要在被测试的方法前面加上
@Test注解就可以将该方法标注为测试方法
@Before @After
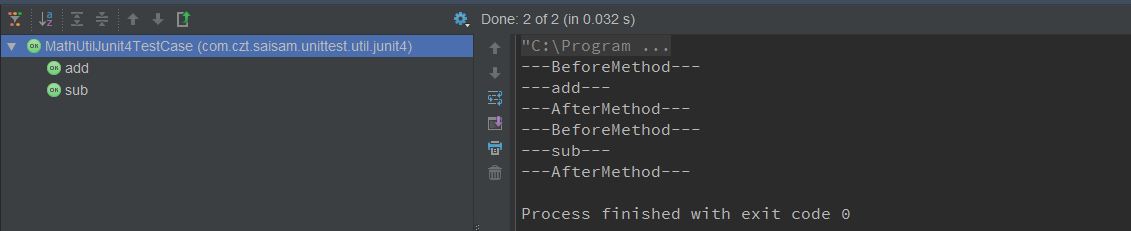
Junit3中,我们重写TestCase的setUp和tearDown方法就可以实现每个测试方法测试前后的初始化和回收,Junit4中,仅需要在需要的方法前面加上@Before、@After即可快速实现相同的功能:
1 | // Junit3 写法 |
1 |
|
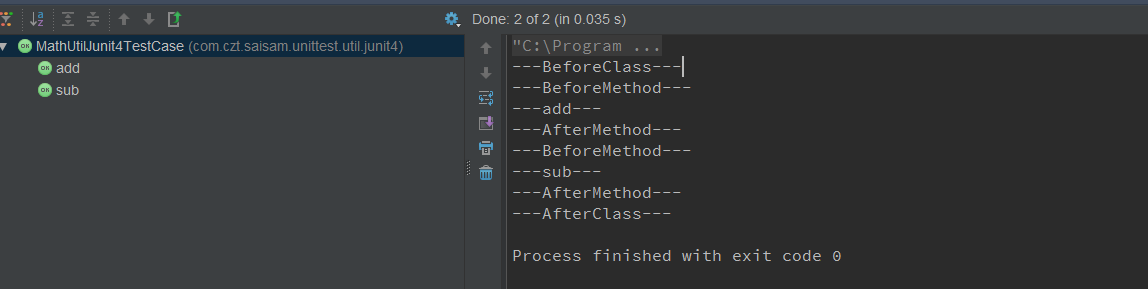
@BeforeClass @AfterClass
Junit4新增了@BeforeClass和@AfterClass两个注解
@BeforeClass:在该类的所有测试方法运行之前,执行一次@AfterClass:在该类的所有测试方法运行完之后,执行一次
1 | public class MathUtilJunit4TestCase { |
@Ignore
Junit4新增了@Ignore注解:被@Ignore注解修饰的测试方法,不会纳入测试结果中,即便错误,也不会影响到整体测试结果
1 | public class MathUtilJunit4TestCase { |

异常测试
Junit3 中测试可能会抛出预期异常的方法时,我们需要针对这部分预期的异常进行处理,标识该异常为“正确的”:
1 | // 待测试类 |
1 | // Junit3 中针对预期异常的写法 |
Junit4中我们仅需要在@Test注解中写上(expected = xxxException.class)
1 | public class MathUtilJunit4TestCase { |
限时测试
Junit4新增限时测试,只需要在@Test注解中加上(timeout = 1000)即可标识这个方法必须在1000ms内跑完,否则测试失败
1 | // 待测试类 |
1 | public class AsyncTaskJunit4TestCase { |

@RunWith
在上文Junit3使用中,我们说到,Junit的运作模式: TestCase -> TestSuite -> TestRunner ==> TestResult,但是上文并没有怎么讲到TestRunner,这是因为在Junit4中讲解比较容易理解。
参数化测试 @Parameterized
回顾Junit3中的参数化测试,不断copy同一个方法:
1 | // 待测试类 |
1 | public class StringUtilJunit3TestCase extends TestCase { |
在Junit4中,我们可以通过
@RunWith:指定我们的测试环境为参数化测试(Parameterized.class)
同时,将所有的参数列为一个数组,并修饰为@Parameterized.Parameters(),然后,通过自定义构造函数,为每组测试参数赋值,然后调用测试方法进行测试:
1 | @RunWith(Parameterized.class) |
打包/套件测试 @Site.SuiteClasses
在Junit3中,我们定义一个TestSuite,在运行时,默认是运行在TestSuite中
1 | public class Junit3TestSuite extends TestSuite { |
在Junit4中,我们可以通过
@RunWith:指定测试环境为Suite.class@Site.SuiteClasses({xxx.class, xxx.class}):指定待测试的类
来实现同样的操作
1 | @RunWith(Suite.class) |
指定测试方法执行顺序 @FixMethodOrder
从Junit4.11版本开始,Junit支持指定测试执行顺序,只需要在测试类添加下面3个注解之一即可:
| 参数 | 说明 |
|---|---|
@FixMethodOrder(MethodSorters.DEFAULT) |
默认值,使用一个确定的但是不可预测的排序 |
@FixMethodOrder(MethodSorters.NAME_ASCENDING) |
根据测试方法的方法名排序,按照词典排序规则(ASC,从小到大,递增)。 |
@FixMethodOrder(MethodSorters.JVM) |
保留测试方法的执行顺序为JVM返回的顺序。每次测试的执行顺序有可能会所不同。 |
1 |
|

实际测试,MethodSorters.DEFAULT和MethodSorters.NAME_ASCENDING基本一样的执行顺序,这里还没搞懂不同的地方,而且仅有的这3个参数其实并不能满足我们的实际需求,如果确实需要制定测试执行顺序,感觉下面两个方案可行:
- 采用Junit4的这种指定测试执行顺序的参数,但是需要将你的测试方法名都要修改为能够按照字母由小到大排序的命名;
- 将需要按照顺序指定的测试方法集中到一个方法中执行,以模拟按指定顺序执行。
命令行运行测试
通过运行 ./gradlew test 即可运行项目的单元测试用例
测试报告
Junit的单元测试报告位置默认在 build/reports/tests/ 目录下,里面有 index.html 文件,打开就可以看到测试报告(通过率,失败原因等等等)
也可以在 build.gradle 文件中重新制定测试报告的位置
1 | android { |
参考资料
在写本文的时候,我参考了很多相关的资料,但是在编写过程中,忘记了一些参考链接,或者该参考资料仅在某一点上有参考价值,因此总结下来,下面参考资料在我编写本文的时候提供了极大的帮助:
项目源码地址
本系列的源码我都会统一放在这个项目上UnitTest。